Check out our webinar to learn more about helping build good grip
Get ready! Get set! Get a Grip! Learning Without Tears is getting "hands on" in this webinar designed to teach instructors how to ensure proper pencil grip in the classroom.
Participants will learn effective, multisensory strategies, participate in fun activities, and leave empowered to implement them both in the classroom.
Different Types of Grips or Grasps
Age to Teach Grip
Pencil Grip Tips
Understanding The Hand
There are two sides to the hand. The first is considered the “mobile” side. It includes the thumb, index, and middle finger. These fingers move when you write. The other side is considered the “stable” side. It includes the ring and pinky finger. These two fingers generally are closed and resting on the table during writing. The web space is the open area between the thumb and the index finger. It is where the pencil should rest during writing.
Different Types of Grips
What is the correct grip? Here’s a picture. Notice that there is a choice. Some children like to pinch with the thumb and pointer. That’s the tripod (3—pinch with thumb and pointer, pencil rests on tall man). Others like the quadropod (4–pinch with thumb and pointer/tall man together, pencil rests on ring finger).
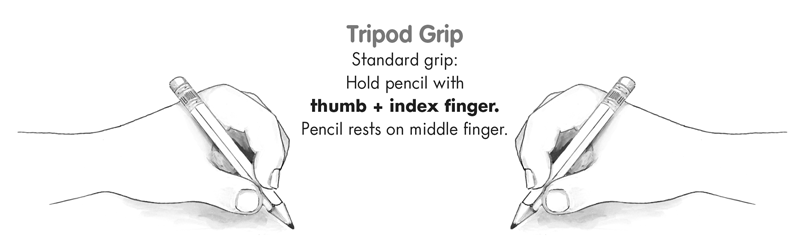
Tripod grip
The Tripod Grip is a writing grip that holds the pen or pencil with the thumb + index finger. The pen or pencil rests on the middle finger when using the tripod grip.
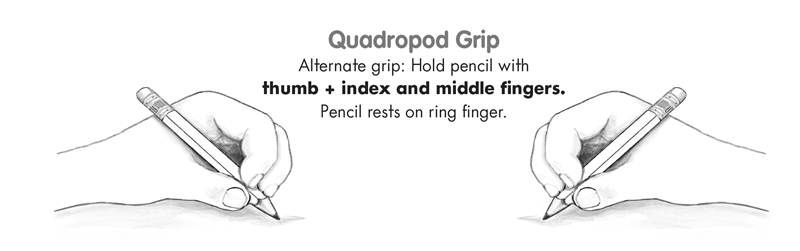
Quadropod grip
The Quadropod Grip is a writing grip that holds the pen or pencil with the thumb + index and middle fingers. The pen or pencil rests on the ring finger when using the quadropod grip.
Use the Screener of Handwriting Proficiency to evaluate and assess skills.
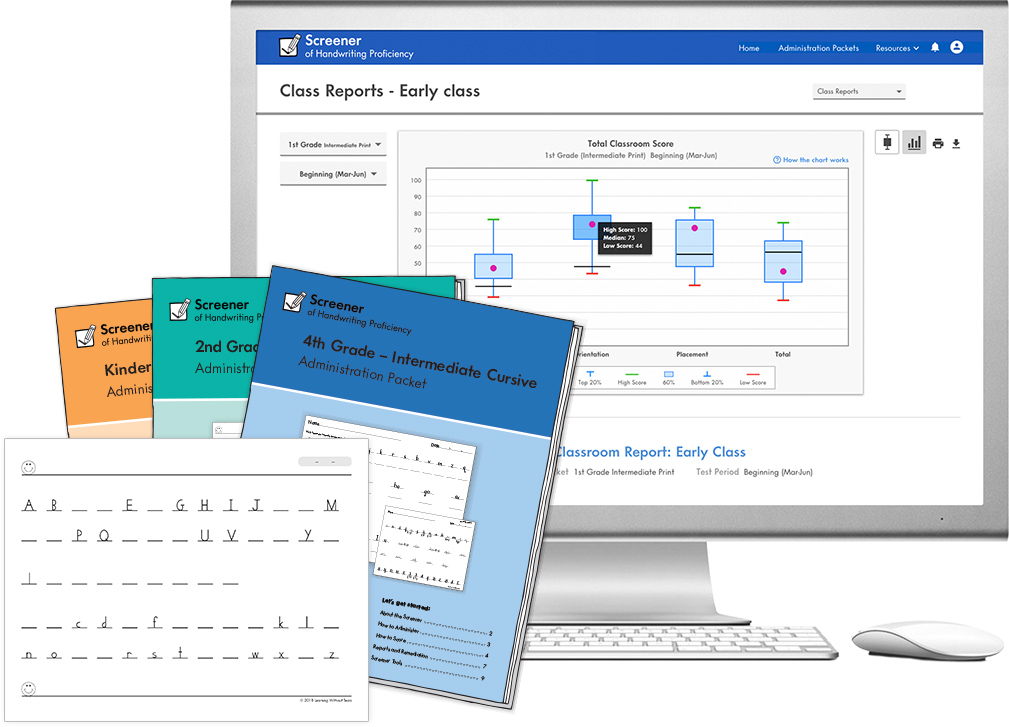
Screener of Handwriting Proficiency
Helpful for every teacher and student, the Screener is a free, easy-to-administer, whole-class assessment that helps educators and specialists assess critical and measurable skills that students need for success.
What Age to Teach Pencil Grip
Good crayon and pencil grips should be actively and regularly taught. Teach grip as soon as age 4 or whenever crayons are introduced. Grip becomes automatic or habitual with repetition. The older the child, the harder it is to change the pencil grip. Try to change grip if it hurts to write, or if the grip makes writing inefficient. Use physical devices only if demonstration and practice haven’t worked.
Always demonstrate proper finger position for children (especially young children). You may use devices as reminders. It’s best not to use pencil grips in Kindergarten as children are just learning correct grip and just starting to write. There are a lot of devices available. Use what works for children (don’t feel limited to the ones shown). If a device is used at school, parents should be educated and the same device should be sent home. It’s handy to have one at home and one at school.
Common Pencil Grip Problems
- Thumb wrapped around, on top of index finger.
- Thumb tucked in, under index finger.
- Fisted grips.
- Fingers splayed out, all gripping the pencil.
- Pencils pointing straight up in the air.
- Awkward wrist positions.
- Pressure problems, such as too hard or too soft.
- Difficulty with big pencils.
Pencil Grip Tips
- Beginners — Avoid special grips or devices for beginners. During Pre-K and Kindergarten, focus on developing hand skills and teaching children. Use small pieces of chalk or crayon and activities to teach crayon/pencil skills.
- Fingers splayed out — This atypical grip is difficult to discourage. Consider giving the child an extremely short pencil. Just sharpen the pencil and use pruning shears to cut it short.
- Pencil pointing straight up in the air — Try two rubber bands looped together. One loop is on the wrist, and the other is looped over the pencil to pull the eraser/pencil back. There is a commercial version available or you may make your own with ponytail holders.
- Pressing too hard — Actively demonstrate soft pressure. Use red or black pencils to make red/pink or black/gray marks. Experiment with mechanical pencils. Demonstrate invisible or very light writing. Let child experiment with cardboard under the paper to see if student can avoid making holes in the paper.
- Pressing too soft — Try softer lead pencils. Use carbonless copies to see if marks go through to the yellow copy. Try to color small areas very dark with red or black pencils.
- Awkward wrist position — Try demonstration with “Aim and Scribble” activity. Try a slanted desk/slant board or vertical surface. Place the paper correctly for the child’s handedness.
Learning Without Tears has proven methods to help you teach grip.
Learning Without Tears has a number of developmentally appropriate, multisensory methods to help teach children proper grip. When it comes to handwriting, children must be taught everything, including how to sit, position the paper, and hold a pencil. This is the physical approach to handwriting. Sometimes it’s the physical approach, not the letters and numbers, that causes a child to struggle with handwriting. Think of it like playing a musical instrument; if you don’t know how to position yourself and hold the instrument correctly, how can you play beautiful music? The same is true with writing letters and numbers. The ability to position yourself and hold your pencil correctly has a lot to do with being able to write legibly.
Check out our webinar, Get a Grip, for tips on teaching grip.
For more pencil grip teaching tips and activities, download our PDF here: Hold On...You Have to Teach Grip!