Box Components
There are four types of magnets (107 total magnets) included in the Sound Around Box that are required for the Sound Around Box activities.
A
Panel A — WhiteB
Panel B — Light blue (faces you to start)C
Panel C — Dark blueD
Panel D — Bottom panel (slides into interior grooves)E
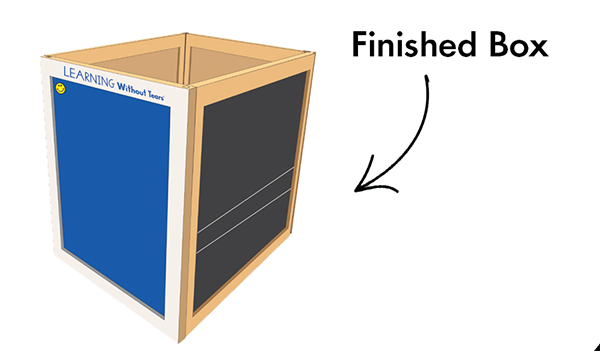
Panel E — Blackboard panel with double white lines (top panel)F
Panel F — White plastic bracing bar (flexible)
How to Assemble the Sound Around Box
1
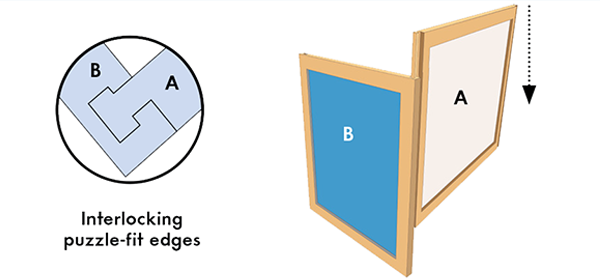
Connect Panels A & B
Hold the light blue panel B so that it faces you. Slide the white panel A into the right edge of panel B, joining them along their interlocking puzzle-fit edges.
2
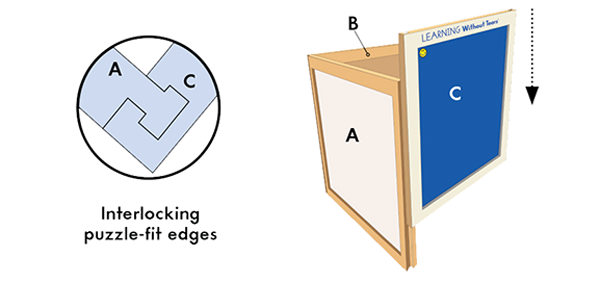
Add Panel C
Slide the dark blue panel C into the right edge of panel A, joining them along their interlocking puzzle-fit edges.
3
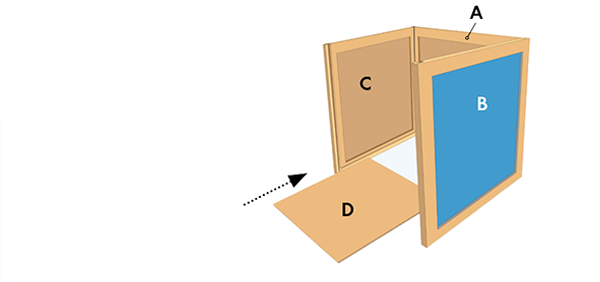
Insert the Bottom Panel (D)
Line up the grooves on panels A, B, and C so they match along the inside bottom panel frames. Then, slide the box’s bottom panel D into the frame grooves of B and C, until it fits into the groove on panel A.
4
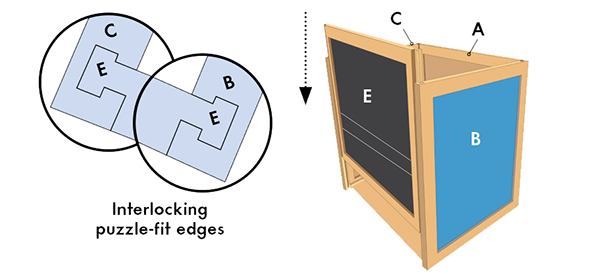
Install Blackboard Panel E
From the top of the box, slide the blackboard panel E into the interlocking puzzle-fit edges of panels B and C.
5
Attach Bracing Bar F
Flip the box upside down. Insert bracing bar F into the notch at the center of panel E. Then gently bend bracing bar F into a slight arch to fit in the notch at the center of panel A. The ends of bracing bar F will lock into the notches on panels E and A.

6
You're all done!
Time to celebrate and enjoy the learning. For best results, the box should remain assembled once constructed.
Your Sound Around Box Is Ready to Use
- • Use the the white dry-erase panel for phonological awareness and alphabet knowledge activities with the Magnetic Picture Tiles and Blue Token Magnets.
- • Use the dark blue panel for capital letter formation and alphabet knowledge activities with the Magnetic Pieces for Capitals.
- • Use the chalkboard panel for phonological awareness and alphabet knowledge activities with the Lowercase Letter Magnets, Magnetic Picture Tiles, and Blue Token Magnets.
- • Use the light blue panel for organizing and storing magnets.
- • For best results, keep the box assembled after construction.